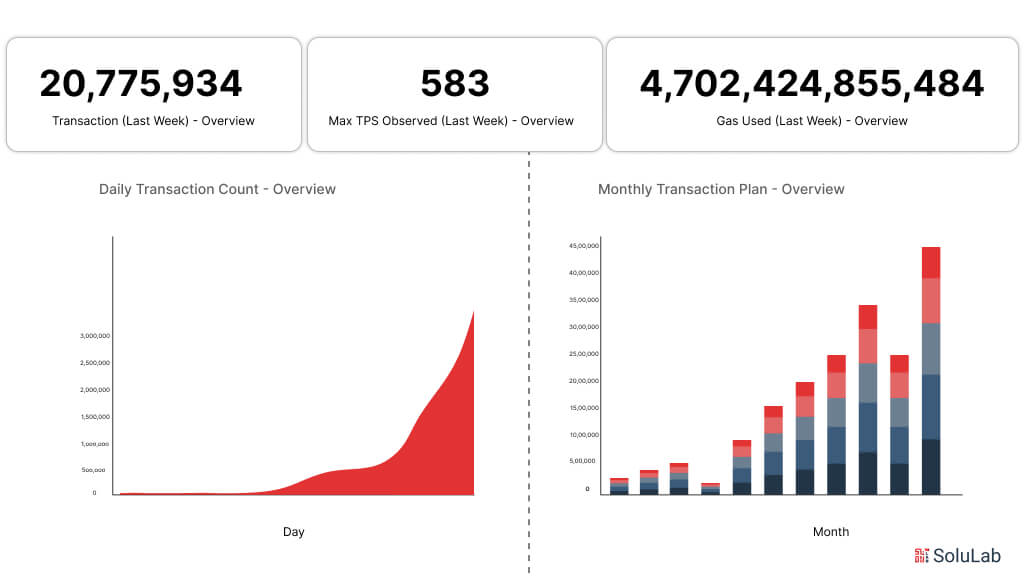
Avalanche lets you build decentralized applications, dApps, and put them in front of real users who pay to use them. The network has grown fast. Reported figures put 20,952,045 transactions through it, and that count keeps climbing. Investors noticed. More of them now fund Avalanche blockchain dApp development, mostly because it makes the money side of an app feel less painful for the person clicking the button.
People call Avalanche the “Blockchains of Blockchains,” and the nickname is earned. Solana and Ethereum are single chains. Avalanche is three chains wired together, each one carrying a different job. It is open source, it scales, and the pieces talk to each other, which is why business deployments and dApp builds land on it.
What is Avalanche?
Avalanche, a blockchain protocol, was built around what DeFi dApps and corporate blockchain rollouts actually ask for. It scales, it plugs into other networks, and the code is open. And it is not one chain the way Ethereum or Solana is one chain, which is exactly why it picked up the “blockchain of blockchains” label. Three separate chains sit underneath, each with a job of its own. That split is what makes the platform bend to different workloads instead of forcing every workload through the same pipe.
Those three chains:
1. Exchange (X) Chain: Creates assets, manages them, and pushes transactions through.
2. Platform (P) Chain: Creates subnets, coordinates validators, runs network governance.
3. Contract (C) Chain: An Ethereum Virtual Machine (EVM) instance, so smart contracts run here without translation.
The rest of this piece stays on the Contract (C) Chain, because that is where smart contract work happens and where anyone building dApps on Avalanche will spend their time. Build and deploy on the Avalanche blockchain, and you are building on the C-Chain.
The Architecture Of Avalanche Blockchain
Avalanche carries business blockchain deployments and decentralized apps without much friction, and the reason sits in how it is put together. So here is the architecture, piece by piece. Skip this section and you will end up guessing later, when something breaks and you cannot tell which layer owns the problem.
Avalanche Network
The Avalanche Network is the hub everything else hangs off. It coordinates, it secures, and it keeps the separate parts compatible so they behave like one system rather than three strangers. Building decentralized apps here (Avalanche dApp development) means using those parts together: scalable, secure, decentralized, and ready to carry an application you intend to keep running.
Subnets
A subnet is its own blockchain, shaped around one application. You build and tune them with the Subnet Builder. Contract chains are one of the flavours on offer, tuned for running smart contracts, and they are quick and hard to tamper with. That combination is why they end up under most dApps and a good chunk of blockchain development solutions.
Validator Nodes
Validators keep transactions honest on Avalanche. They hold the network together and reach consensus through proof of stake (PoS). To take part, a validator stakes AVAX, and the stake earns rewards. Every transaction gets checked by them before it joins the chain. Who gets picked comes down to three things: how much AVAX is staked, how the node has performed, and how long it has stayed up.
What is the Avalanche Contract (C) Chain?
The C-Chain is an Ethereum Virtual Machine (EVM) replica. Write smart contracts against it the way you already write them. Avalanche’s own pitch for the chain comes down to four claims: more throughput, higher speed, confirmation that lands fast, and cheaper fees. The reason is the consensus layer. The C-Chain runs Proof-of-Stake (PoS) on the Snowman Consensus Protocol, where Ethereum ran Proof-of-Work (PoW). And because the EVM is right there, the whole Ethereum tooling shelf is open to you. Nothing to re-learn.
Key Features of Avalanche Contract Chain
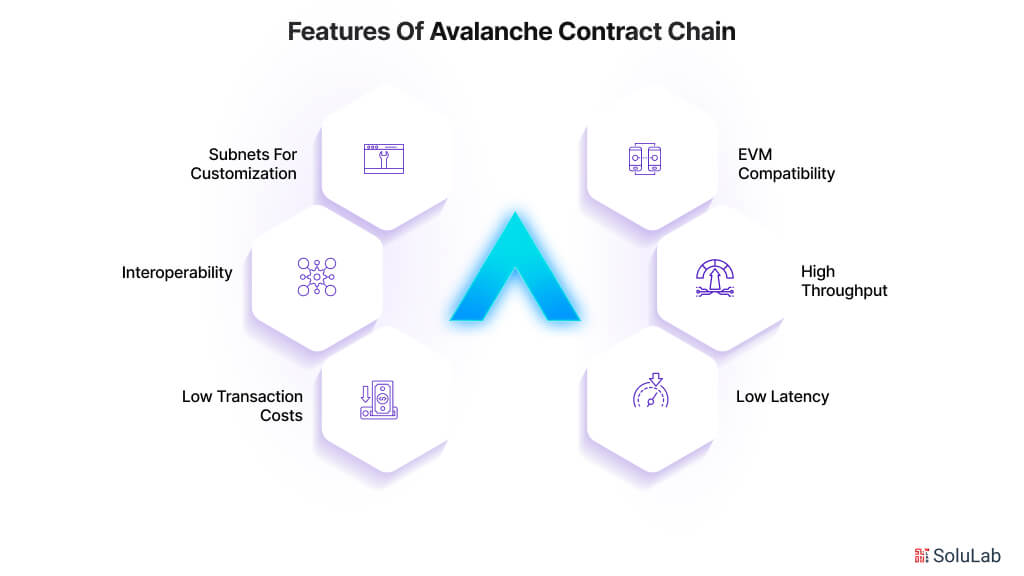
Of everything Avalanche offers, the C-Chain is the part aimed squarely at businesses. It hands an enterprise the tooling and the infrastructure to put dApps into production that would not have survived on older rails. Companies that want to actually put blockchain technology’s to work inside their operations tend to have hard requirements, and the C-Chain’s feature set was drawn to answer those.
EVM Compatibility
EVM compatibility is the quiet reason teams pick this chain. Solidity, still the default smart contract language, runs natively here, so whatever your team already knows carries over unchanged. No second toolchain. No separate environment to babysit. The learning curve mostly disappears. Which means moving existing Avalanche smart contract dApps across from Ethereum is close to a copy operation rather than a rewrite.
Solidity and the tools built around it work on the C-Chain the way they work anywhere else. That shortens the gap between writing a dApp and deploying one. It also drops the entire Ethereum knowledge base in your lap: tutorials, documentation written by people who hit the same wall you are hitting, and a community that answers. Development moves faster when you are not the first person to ask the question.
High Throughput
Snowman Consensus Protocol takes the C-Chain up to 4,500 transactions per second (TPS). For an enterprise app pushing serious volume, that number is the difference between a queue and a product.
Think supply chain tracking, where a pallet moves and the record has to move with it. Payment processing fits too. The throughput holds up when transactions arrive in bursts instead of politely spaced out.
Low Latency
Finality on the C-Chain arrives in seconds. For enterprise software, that matters more than most feature lists admit. Industries such as financial services and decentralized exchanges live on it, because a decision made at 10:00:01 is worth less than the same decision made at 10:00:00. Transactions clear quickly, the waiting shrinks, and operations stop stalling on confirmation.
Low latency also changes what you can build. Real-time updates. Settlement that happens while the user is still looking at the screen. Interfaces that do not need a spinner. Industries that depend on fast, dependable transactions get tighter operations, better decisions, and customers who stop complaining about wait times.
Low Transaction Costs
Ethereum gas fees swing, and sometimes they swing into territory that kills a product’s margins. C-Chain fees sit considerably lower. Running a dApp on Avalanche costs less month to month, which keeps operating expenses sane and gives the thing a chance to survive past year one.
Cheap fees also make a category of product viable again: micro-transactions and micro-services. Small payments. Frequent ones. On a high-fee network, the fee eats the payment and the idea never ships.
Interoperability
Assets move between Avalanche and Ethereum without drama, so a developer does not have to pick one network and live with the consequences. You get both. That is what makes the more interesting dApp designs possible in the first place.
A concrete version: a dApp on the C-Chain can reach into the deep liquidity of Ethereum’s decentralized finance (DeFi) ecosystem while still settling on Avalanche, where it is faster and cheaper. Borrow the strength of each. That is how the more sophisticated applications get built, and it opens doors that a single-chain design keeps shut.
Subnets for Customization
One more thing the C-Chain gives a business: its own blockchain network, called a subnet. Subnets are sovereign and independent. You set the governance rules, the compliance posture, and the performance targets yourself, instead of inheriting someone else’s.
That flexibility means you can build and deploy decentralized applications (dApps) shaped to what your organisation actually needs. A bank might spin up a subnet purely to satisfy a regulator. A supply chain consortium might run one so member companies can pass sensitive data around without publishing it to the world.
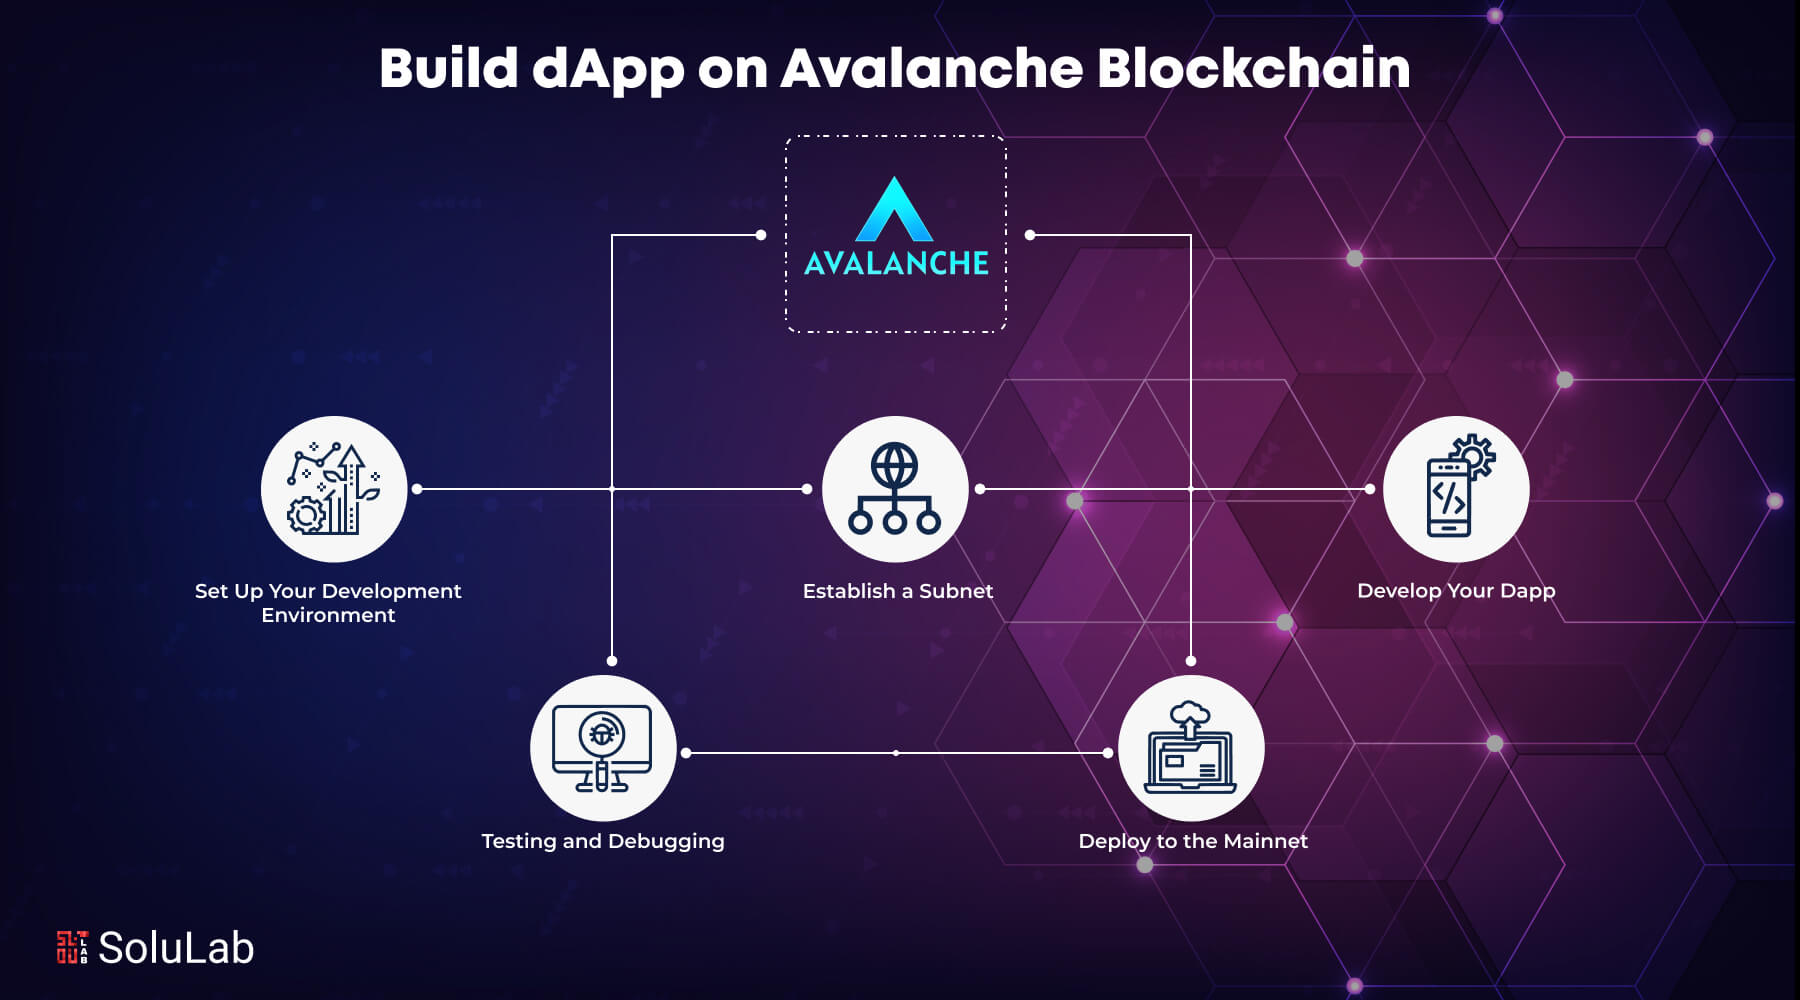
Steps to Build dApps on Avalanche Blockchain
So: EVM compatibility, high throughput, low latency, cheap transactions, cross-chain asset movement, subnets you control. That is the case for enterprise dApp work on Avalanche. Here is how you actually build one.
Step 1: Set Up Your Development Environment
Download and Install Avalanche Node Software:
Before you deploy decentralized applications (dApps) on Avalanche, go to the official Avalanche site and open the downloads page. Pick the installer matching your machine: Windows, macOS, or Linux. Windows gets the AvalancheGo executable, and you walk through the setup wizard after it lands. macOS and Linux get installation scripts instead. Run them and follow what the terminal tells you.
Verify Installation:
Did it install? Open a terminal or command prompt and type “avalanche-go“. If the install took, you get a printout of every available command and option. If you get nothing useful back, the install did not take.
Generate a Wallet Address:
No wallet address, no safe way to touch the Avalanche network. Use the official Avalanche Wallet, or any compatible wallet you already trust. Walk through whatever setup that provider asks for and it hands you a unique wallet address at the end.
Purchase AVAX Tokens:
AVAX is Avalanche’s native token. It pays your transaction fees and it is what validator nodes stake. You buy it on cryptocurrency exchanges like Binance, Kraken, or Coinbase. Open an account with one of them, then follow their flow to buy AVAX with whatever payment method you prefer.

Step 2: Establish a Subnet to Enhance Your Dapp’s Functionality
Define Subnet Parameters:
Name: pick something unique that tells a stranger what your Dapp does, and that you can spot in a list six months from now. Purpose: write down what the subnet is for, the specific use case or the application it serves. Rules: decide what validators on your subnet are and are not allowed to do. These rules settle who can validate at all, and what they can do once they are in.
Stake AVAX:
Work out the minimum AVAX your subnet needs before you can create it. The figure moves with how you have configured the subnet and how many validators you intend to run. Then stake that amount into the subnet creation contract. The stake is what secures the subnet, and it is what pays the validators for showing up.
Select Validators:
Now choose who runs and guards your subnet. Validators check transactions, hold the subnet’s security line, and keep the thing running day to day. Two routes here. Run your own validator nodes, and you get control and room to tune. Delegate your stake to existing validators instead, and you are in the subnet without owning any infrastructure. In practice this is where small teams decide how much operations work they can realistically absorb.
Receive Subnet ID:
Creating the subnet returns a unique subnet ID. That string is how the Avalanche network tells your subnet apart from every other one. Keep it somewhere you will find it, because your Dapp needs it to talk to the subnet and you need it to manage the subnet’s resources.
Step 3: Develop Your Dapp
Choose a Programming Language:
Solidity, Go, Rust, Python: Avalanche takes all of them. Read up on where each one is strong and where it will bite you, then match that against what your Dapp has to do. Weigh how widely the language is used, how good the tooling is, and whether you can hire people who write it. Already fluent in Solidity? Stay there, the adoption and the community are on your side. Chasing raw performance? Rust earns its reputation. New to this? Python and Go are kinder to learn and get you to a working thing sooner.
Create Smart Contracts:
Your smart contracts are the Dapp. They hold the logic and the rules, and everything else is a wrapper around them. Write your smart contracts in a plain text editor or a full IDE, whichever you are faster in. Learn the syntax and the semantics of your chosen language properly, not halfway. Spell out the functions, the variables, and the data structures. Then test. Test hard, across the odd cases as well as the obvious ones, because a contract that misbehaves on chain is not something you can quietly patch.
Deploy Smart Contracts:
Push the contracts to a subnet using the Avalanche SDK. Avalanche DeFi dApp developers get real value out of a subnet, since it is a private network inside Avalanche and your Dapp gets the room to itself. Ava Labs publishes documentation and tutorials for setting one up and keeping it running, and they are worth reading before you improvise. From there, the Avalanche CLI or the web interface is how you call your contracts and send transactions.
Develop a User Interface:
The interface is the only part of your Dapp most users will ever see. Pick a front-end framework you and your team will be productive in. React, Angular, and Vue.js are the usual answers, all three are well supplied with components and documentation. Avalanche dApp development services can help shape an interface people understand on first contact rather than third. Add the interactive parts, buttons, forms, charts, wherever they earn their place. And make it responsive, because a meaningful share of your users will open it on a phone.
Step 4: Testing and Debugging
Leverage Avalanche’s Testnets for Risk-Free Testing:
Test on Avalanche’s test networks first. Nobody loses real money there. A testnet copies the environment and hands you AVAX tokens that exist only for testing. Avalanche runs more than one, and they differ, so read what each gives you and pick the one that matches what you need to prove. The developer community around Avalanche is active and generous with testnet advice, which saves a surprising amount of time.
Identify and Resolve Smart Contract Issues:
Something in the contract is broken. Find it with proper debugging tools instead of guesswork. Avalanche blockchain dApps lean on the Avalanche CLI and the Avalanche Web3 Console for exactly this. While you are in there, learn gas optimization, because it decides both how fast your contracts run and what they cost every single time someone calls them.
Measure Performance and Scalability:
Measure, do not assume. Run your Dapp under different loads with Avalanche Bench and Apache JMeter, and see whether the numbers match what you promised. Get clear on how transaction volume, block size, and network congestion pull on each other. Find the bottleneck in your architecture, then fix it. Contract complexity feeds directly into scalability too, so tighten the contracts for efficiency. The goal is more transactions without loosening anything on the security side.
Step 5: Deploy to the Mainnet
Prepare Your Dapp for Mainnet Deployment:
Get the contracts audited by a security firm with a real reputation, and fix what the audit finds. Avalanche dApp marketplace developers should also squeeze gas: batch transactions where it makes sense, use algorithms that are not wasteful, and keep fees down. Rewrite the documentation and the interface copy so they describe mainnet, not testnet. Tell users plainly how to interact with the live Dapp. Before any of that goes out, run the whole thing on a staging environment built to look like mainnet. Problems surface there cheaply. They surface on mainnet expensively.
Transfer Assets to the Mainnet:
Pick a bridge or cross-chain solution with a record you can check, not one that launched last month. Read its documentation properly, then follow the instructions to move your contracts and assets from testnet to mainnet. Check every asset and every contract address twice before you press go. A multi-sig wallet adds another layer of protection and is worth the extra step. Watch the transfer the whole way through and confirm each asset actually arrived.
Update Dapp Configuration:
Point your configuration files at mainnet nodes and the mainnet contract addresses. Confirm the Dapp is hitting the right endpoints on the right network, because a stale testnet endpoint is the classic post-launch bug. Then test on mainnet properly. Watch gas costs and transaction speeds especially closely. Keep an eye on performance and usage metrics afterwards, and let them tell you what to fix next.
Market Your Dapp:
A good Dapp nobody knows about is still a Dapp nobody uses. Build a marketing plan pointed at the users you actually want, and tie it to your business goals rather than vanity metrics. Publish things worth reading: posts, tutorials, videos, infographics that explain what your Dapp does and why anyone should care. Use social media platforms, forums, and developer communities to gather people around the project and talk to them directly. Working with influencers and respected voices in blockchain lends visibility and credibility you cannot buy outright. Show up at industry conferences too. Users and partners are easier to find in a room than in an inbox.
Monitor and Maintain Your Dapp:
Launch is the start. Keep analytics and monitoring services watching performance and security around the clock. Put serious defences in place: access control, encryption, security audits on a schedule rather than when you remember. How to build dApps on Avalanche is not only a development question, it is also about what you do when a user or a security researcher reports something and the clock starts. Ship updates regularly. New features, bug fixes, patched vulnerabilities. Talk to your community while you do it, so people know what changed and why. A support channel where users can ask questions and file issues pays for itself quickly.
Conclusion
A dApp on Avalanche gives a developer room to work: it scales, it runs efficiently, and the security floor is high. Low fees, high throughput, and subnets you configure yourself mean the app can meet what a decentralized economy actually demands of it rather than what it demanded three years ago. None of this is simple work. It gets considerably less painful with blockchain development companies walking each phase with you. DePIN Blockchain as a Service takes the infrastructure burden off your plate too, so the team spends its hours on the product instead of the backend it never wanted to run.
Take a look at our recent case study on OBORTECH. SoluLab brought a Blockchain as a Service platform into the company’s SmartHub. SmartHub ties blockchain to IoT devices so data comes in live and can be acted on live, which is what makes supply chain records both transparent and hard to quietly alter. SoluLab built out a staking platform for OBOT tokens and a cryptocurrency payment gateway. Engagement went up, and the financial side got noticeably less clunky. The wider point: interoperability and scalability are the two walls most blockchain projects hit, and an experienced partner gets you past them, while also making the interface usable by people who do not care how any of it works.
SoluLab sits among the leading blockchain development companies, building Blockchain as a Service and custom dApps across a range of industries. Launching on Avalanche, or weighing up DePIN Blockchain as a Service? Either way, we can shorten the road. Ready to scale what you have already got? Hire a Blockchain Developer from SoluLab and let us get into the details of your project.
FAQs
Bhavya is driving growth through data-backed demand generation for AI and Web3 solutions. With 9+ years in digital marketing, he has spearheaded initiatives that led to a 40% increase in qualified inbound leads. Bhavya shares insights on marketing ROI and scaling a digital presence via AI workflows. He is open to connecting with startups and enterprise teams to help them overcome their challenges.